Introduction
In photography, getting the perfect exposure can feel like chasing a moving target. Bright skies, dark shadows, and tricky lighting conditions often force photographers to choose between blown-out highlights or murky shadows. Enter auto bracketing — a powerful camera feature that takes the guesswork out of exposure and ensures you never miss a shot. In this guide, we’ll break down what auto bracketing is, why it’s essential, and how to use it to elevate your photography.
What Is Auto Bracketing?
Auto bracketing (AEB, or Automatic Exposure Bracketing) is a camera setting that automatically takes a series of shots at different exposure levels. Instead of relying on a single frame, you get multiple images: one underexposed, one properly exposed, and one overexposed. Some cameras allow you to take 5, 7, or even 9 bracketed shots for extreme dynamic range.
This technique is a game-changer for scenes with high contrast, such as sunsets, indoor interiors with windows, or landscapes with bright skies and shadowy foregrounds. By blending these exposures later (via HDR merging or manual editing), you can create a final image with balanced lighting and detail in every part of the frame.
How Does Auto Bracketing Work?
When you enable auto bracketing, your camera adjusts one of three exposure settings for each shot in the sequence:
- Aperture: Controls depth of field (rarely used for bracketing to avoid focus shifts).
- Shutter Speed: Adjusts how long the sensor is exposed to light (most common for bracketing).
- ISO: Modifies the sensor’s sensitivity (not ideal, as higher ISO can introduce noise).
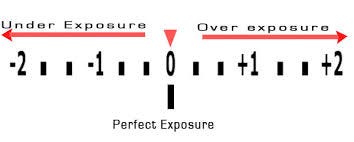
Most photographers bracket using shutter speed to maintain consistent depth of field and minimize noise. For example, if your base exposure is 1/100s at f/8, the camera might take three shots:
- Underexposed: 1/200s (darker, preserves highlight details).
- Properly exposed: 1/100s.
- Overexposed: 1/50s (brighter, recovers shadow details).
You can customize the number of shots and the exposure increment (e.g., ±1 EV, ±2 EV) based on the scene’s contrast.
Why Should You Use Auto Bracketing?
- Capture High Dynamic Range (HDR): Merge bracketed shots in post-processing to create an HDR image with detail in both shadows and highlights.
- Safety Net for Tricky Lighting: Avoid missing a shot in fast-changing conditions (e.g., weddings, events, or travel photography).
- Focus Stacking Compatibility: Some photographers use exposure brackets alongside focus stacking for maximum sharpness.
- Creative Flexibility: Experiment with different exposures to find the mood that best suits your vision.
When to Use Auto Bracketing
- Landscape Photography: Balance bright skies with darker foregrounds (e.g., mountain scenes or seascapes).
- Real Estate/Interiors: Capture rooms with windows without blowing out outdoor views.
I always use Auto Bracket when taking Real Estate Photos.
- Sunrise/Sunset: Retain color and detail in both the sky and the landscape.
- Product Photography: Ensure every texture and color is perfectly exposed.
How to Set Up Auto Bracketing
(Note: Menu options vary by camera brand. Below is a general guide.)
- Access the Bracketing Menu: Look for “AEB,” “BKT,” or “Exposure Bracketing” in your camera settings (often under drive modes).
- Choose the Number of Frames: Select 3, 5, or 7 shots depending on the scene’s contrast. (Most cases 3 is enough)
- Set the Exposure Increment: For most scenarios, ±1 EV or ±2 EV works well. Extreme contrast may require ±3 EV. (Usually I keep it on 0)
- Select Shooting Mode: Use a tripod and set your camera to continuous burst mode or self-timer to avoid shake between shots.
- Shoot in RAW: RAW files retain more detail for post-processing flexibility.
I prefer 2s timer and 3 Photos that are -1 stop, 0 and +1 stop when I am shooting Real Estate photos
Tips for Mastering Auto Bracketing
- Always Use a Tripod: Keep your camera steady to ensure all bracketed shots align perfectly for the editing process.
- Shoot in A (aperture priority) Mode: Nikon D850 needs “A” mode when taking the Auto Bracket images
- Check the Histogram: Verify that your darkest shot preserves highlights and your brightest shot recovers shadows.
- Practice in Post-Processing: Learn HDR blending tools like Lightroom’s “Merge to HDR” or Aurora HDR for natural-looking results.
Common Auto Bracketing Mistakes to Avoid
- Overdoing HDR: Heavy-handed editing can make images look unnatural (think radioactive skies or cartoonish textures).
- Ignoring Motion: Bracketing won’t work for fast-moving subjects (e.g., waves or birds) unless you’re blending exposures manually.
- Skipping the Tripod: Handheld bracketing often leads to misaligned frames, complicating post-processing.
I can’t stress this enough NEVER skip the Tripod.
Conclusion
Auto bracketing is one of the most underrated tools in a photographer’s toolkit. Whether you’re battling harsh midday sun, preserving the mood of a golden-hour landscape, or ensuring a client’s product photos look flawless, bracketing takes the stress out of exposure. By mastering this feature, you’ll spend less time fixing problems in post and more time capturing the beauty of the world — one perfectly exposed frame at a time.
Leave a Reply