1. Understanding Your Camera
Tips:
- Read the Manual: Start by thoroughly reading your camera’s manual to understand all its features and settings.
- Practice Settings: Spend time experimenting with different settings like aperture, shutter speed, and ISO in various lighting conditions.
- Use Presets: Utilize presets or modes like aperture priority, shutter priority, and program mode to understand their effects before moving to manual mode.
Examples:
- Aperture: Shoot a series of photos with different aperture settings (e.g., f/1.8, f/5.6, f/22) to see how depth of field changes.
- Shutter Speed: Capture moving subjects like waterfalls or cars with varying shutter speeds to freeze or blur motion.
- ISO: Take photos in low light with different ISO settings to observe the impact on noise and image quality.
2. Composition Techniques
Tips:
- Study Masters: Look at the work of famous photographers to understand their composition techniques.
- Frame Within a Frame: Use natural or man-made frames to draw attention to your subject.
- Use Negative Space: Incorporate negative space to make your subject stand out.
Examples:
- Rule of Thirds: Place your subject on the left or right third of the frame instead of the center.
- Leading Lines: Use roads, fences, or other lines to guide the viewer’s eye to the subject.
- Symmetry: Capture reflections or symmetrical objects to create balanced and harmonious images.
3. Lighting
Tips:
- Golden Hour: Shoot during the golden hour (just after sunrise or before sunset) for soft, warm light.
- Use Reflectors: Bounce light onto your subject using reflectors to fill in shadows.
- Experiment with Flash: Use off-camera flash to create dramatic lighting effects.
Examples:
- Natural Light: Position your subject near a window for soft, diffused light.
- Artificial Light: Use studio lights or flash to create dramatic portraits or product shots.
- Backlighting: Place your subject in front of a bright light source to create a glowing effect.
4. Post-Processing
Tips:
- Consistency: Develop a consistent editing style that matches your vision.
- Non-Destructive Editing: Use layers and adjustment layers in Photoshop to keep your original image intact.
- Presets: Create and use presets in Lightroom to streamline your workflow.
Examples:
- Basic Edits: Adjust exposure, contrast, and white balance to correct any issues in your raw file.
- Advanced Techniques: Use dodging and burning to highlight specific areas of your image.
- Black-and-White Conversion: Convert color images to black-and-white to emphasize textures and contrasts.
5. Genres of Photography
Tips:
- Specialize: Choose a genre that you are passionate about and focus on mastering it.
- Study Trends: Keep up with the latest trends and techniques in your chosen genre.
- Network: Connect with other photographers in your genre to learn and collaborate.
Examples:
- Portrait Photography: Use softbox lighting and a wide-aperture lens to create a shallow depth of field.
- Landscape Photography: Use a tripod and a wide-angle lens to capture expansive scenes.
- Street Photography: Use a fast lens and a compact camera to capture candid moments discreetly.
6. Business Practices
Tips:
- Professional Website: Create a professional website to showcase your portfolio and services.
- Social Media: Use platforms like Instagram and Facebook to promote your work and engage with clients.
- Client Testimonials: Collect and display client testimonials to build trust and credibility.
Examples:
- Pricing: Research industry standards and set competitive prices based on your experience and location.
- Contracts: Use clear and concise contracts that outline payment terms, deliverables, and cancellation policies.
- Marketing: Run targeted ads on social media and Google to reach potential clients.
7. Legal and Ethical Considerations
Tips:
- Copyright Law: Understand your rights as a photographer and how to protect your work.
- Model Releases: Always get model releases for any recognizable individuals in your photos.
- Location Permits: Check if you need permits or permissions to shoot in public or private locations.
Examples:
- Copyright: Register your work with the copyright office to protect it legally.
- Model Releases: Use standardized model release forms that cover all necessary legal aspects.
- Location Permits: Contact local authorities or property owners to obtain necessary permits for shooting.
8. Continuous Learning
Tips:
- Workshops: Attend workshops and courses to learn from experienced photographers.
- Online Tutorials: Watch online tutorials and webinars to stay updated with the latest techniques.
- Mentorship: Find a mentor or join a photography community for support and feedback.
Examples:
- Workshops: Participate in local or online workshops focused on specific genres or techniques.
- Online Courses: Enroll in courses on platforms like Udemy, Coursera, or MasterClass.
- Mentorship: Join photography groups on social media or local meetups to connect with mentors.
9. Building a Brand
Tips:
- Unique Style: Develop a unique style that reflects your vision and personality.
- Consistent Branding: Use consistent branding across your website, social media, and marketing materials.
- Storytelling: Use your photos to tell a story and connect with your audience on an emotional level.
Examples:
- Unique Style: Experiment with different editing styles and techniques to find your signature look.
- Consistent Branding: Use the same color scheme, fonts, and logo across all your platforms.
- Storytelling: Create photo series or projects that tell a compelling story.
10. Networking
Tips:
- Join Photography Groups: Participate in local photography groups, online forums, and social media communities.
- Collaborate: Collaborate with other photographers, models, and artists to expand your network and gain exposure.
- Attend Events: Attend photography exhibitions, workshops, and industry events to meet other professionals and learn about new trends.
Examples:
- Photography Groups: Join groups on Facebook, Meetup, or local photography clubs.
- Collaborate: Partner with models, makeup artists, or other photographers for joint projects.
- Attend Events: Participate in photography conferences, exhibitions, and trade shows.
My Everyday Gear as a Professional Real Estate Photographer
In the fast-paced world of real estate photography, gear matters. It’s not just about having the most expensive equipment. It’s about using the right tools that consistently deliver high-quality results, especially when you’re on tight deadlines and shooting in constantly changing environments. Over the years, I’ve refined my kit to include gear that I can rely on every single day. Here’s a look inside my bag:
(Post includes affiliate links)
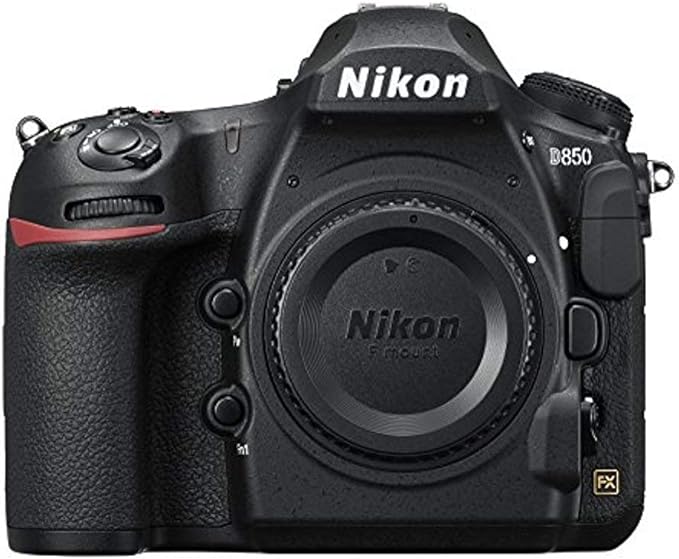
1. Nikon D850 — The Workhorse Buy here
The Nikon D850 is the backbone of my photography setup. Its 45.7MP sensor produces incredibly sharp, detailed images that make interiors pop and architectural details shine. The dynamic range is a lifesaver when I’m working with tricky lighting situations — like bright windows in a dim room — allowing me to retain detail in both highlights and shadows without relying too heavily on bracketing or HDR. This baby is my pride and joy. I love it so much.
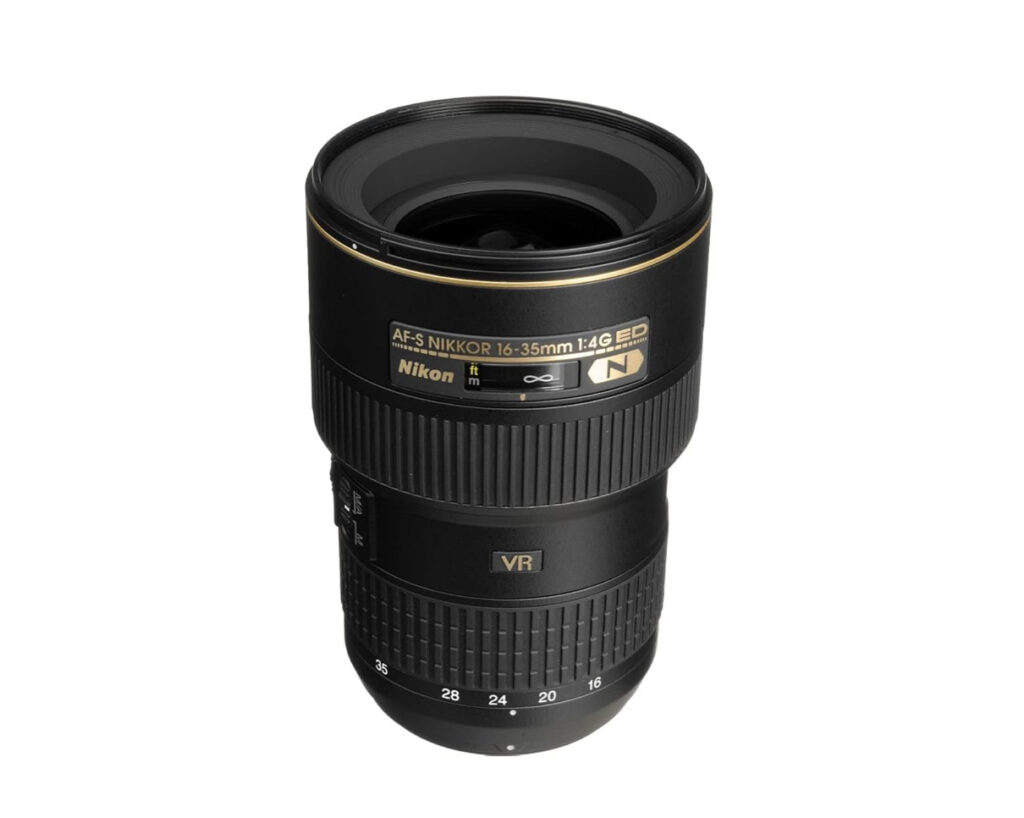
2. Nikon 16–35mm f/4 — Wide and Sharp
For real estate photography, a reliable wide-angle lens is non-negotiable. The Nikon 16–35mm f/4 hits the sweet spot — wide enough to capture spacious interiors but with minimal distortion. It’s sharp edge to edge, and the constant f/4 aperture is more than enough for the well-lit environments I typically shoot in. Paired with the D850, this lens helps me make even modest spaces feel expansive and welcoming.
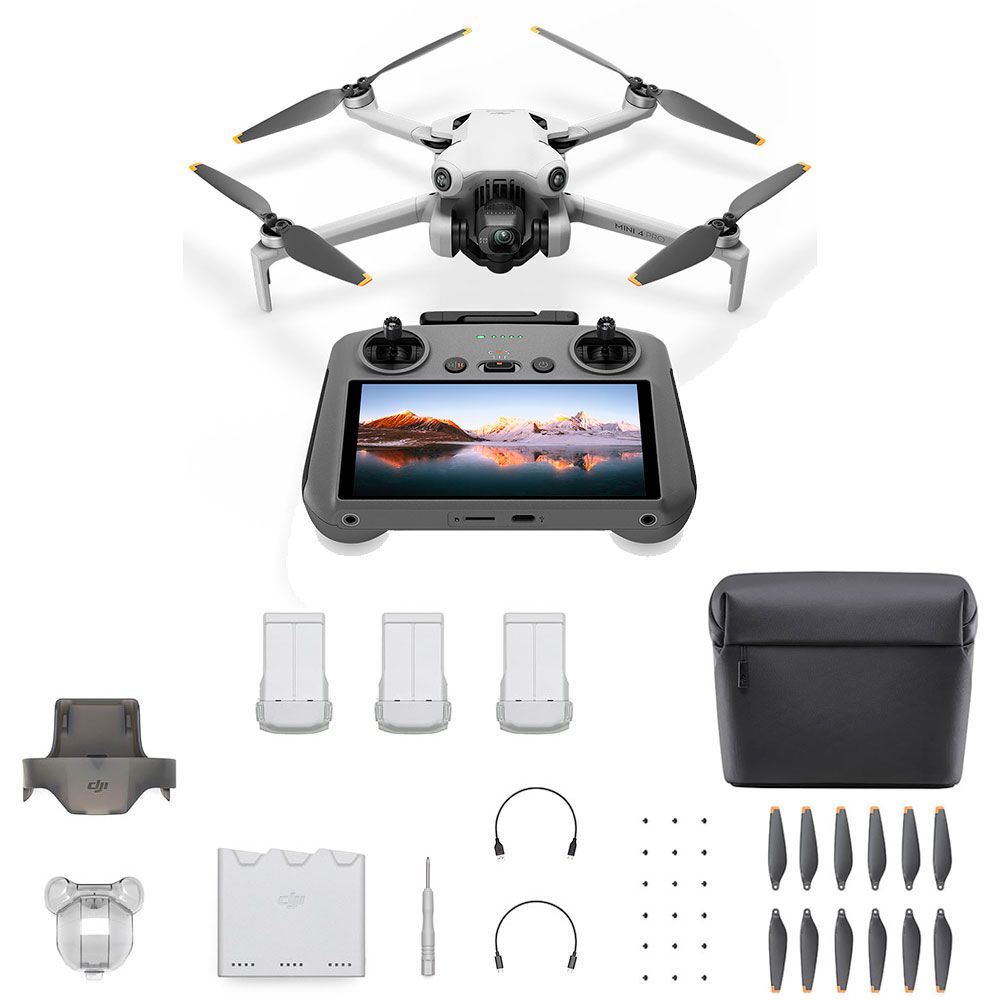
3. DJI Mini 4 Pro Fly More Combo — Aerials Without the Hassle
For those sweeping exterior shots and aerial views that sellers and agents love, I use the DJI Mini 4 Pro. It’s compact, fast to deploy, and incredibly stable in the air. Despite its small size, the image quality is impressive. The Fly More Combo gives me the extra batteries and accessories I need to get through a full day of shooting without worry.
4. Neewer ND Filter Set + CPL for DJI Mini 4 Pro
Lighting conditions can change fast when I’m shooting outdoors, and having the Neewer ND and CPL filters for the Mini 4 Pro is essential. They help cut glare from reflective surfaces like rooftops, windows, and even water, while also allowing for smoother video and better color balance on sunny days.
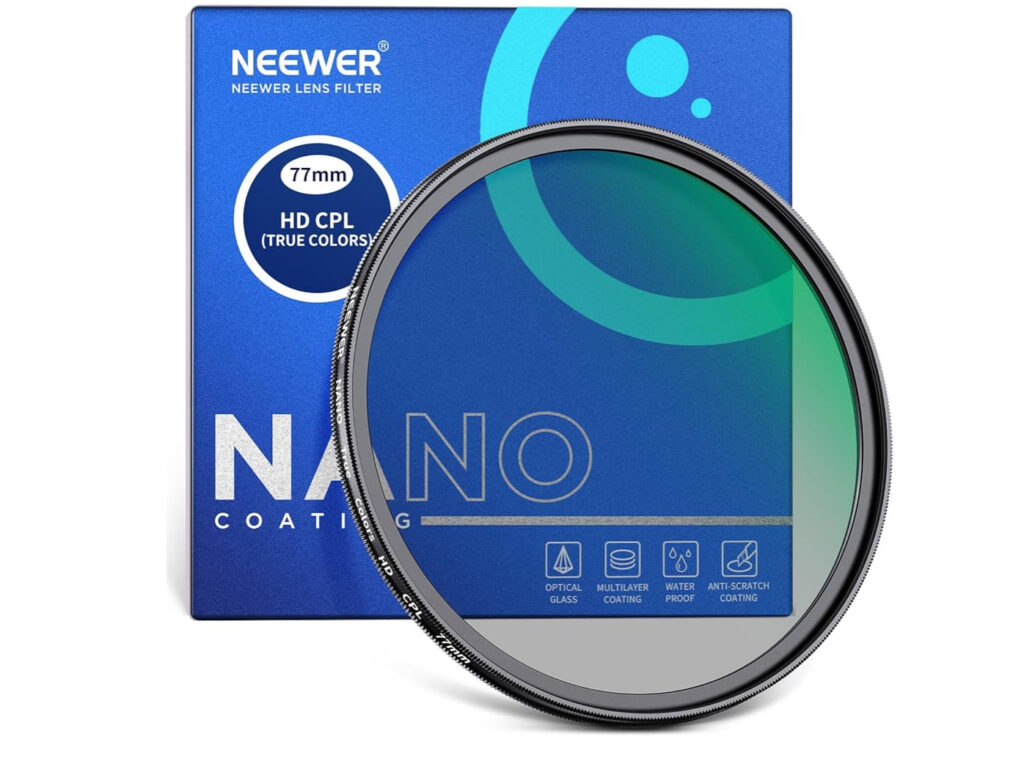
5. Neewer 77mm CPL Filter — Control the Reflections
When photographing interiors, reflections are a constant challenge — especially on glossy countertops, floors, and windows. The Neewer CPL filter for my 77mm lens helps reduce unwanted reflections and deepen colors, giving a more polished and professional look to my photos.
6. Velbon EX-650 Tripod — Steady and Reliable
A good tripod is essential for keeping lines straight and shots consistent, especially when I’m shooting bracketed exposures. The Velbon EX-650 is lightweight enough to carry easily but sturdy enough to keep my camera steady. It’s fast to set up, which is crucial when I’m moving quickly from room to room.
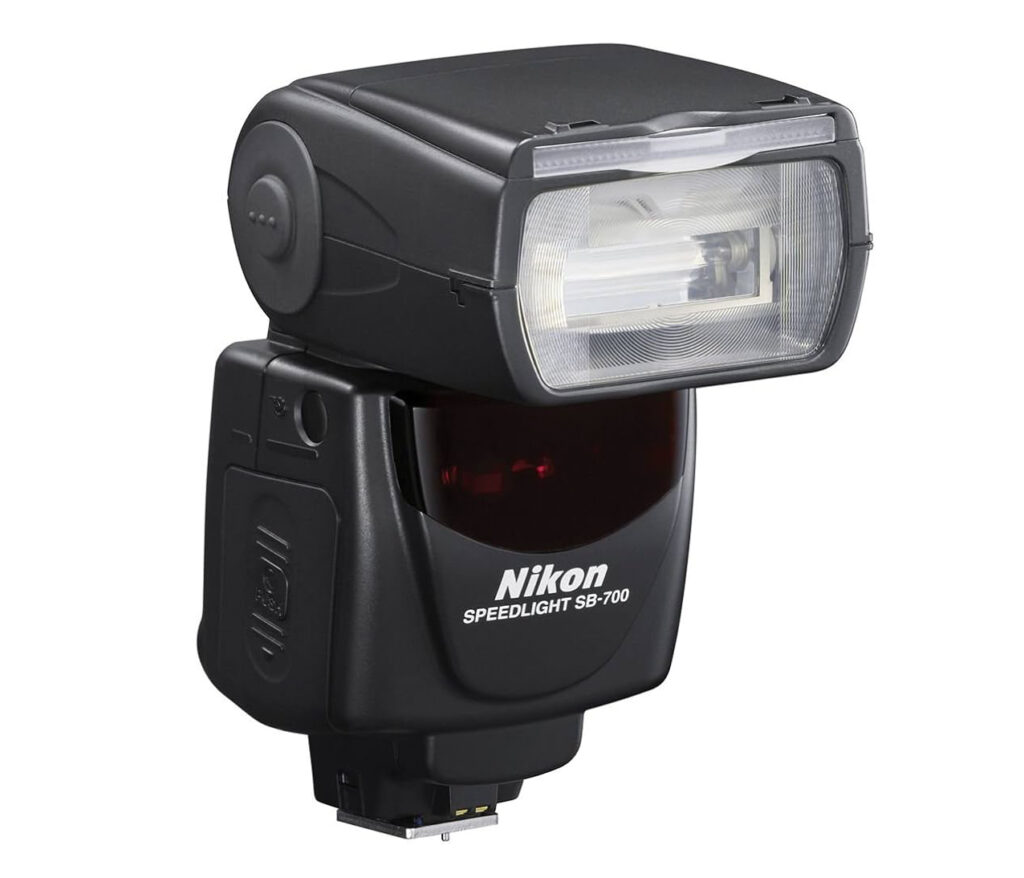
7. Nikon SB-700 External Flash — Fill Light That Doesn’t Overwhelm
Natural light is great, but sometimes I need a little extra fill. The Nikon SB-700 provides clean, controllable light that helps me bring balance to tricky lighting scenarios. Whether I’m bouncing it off a ceiling or using it off-camera, it adds just enough light without looking artificial.
8. Nikon EN-EL15 Batteries — Power That Keeps Me Going
With a full day of shoots, battery life is something I never want to stress about. I always keep several Nikon EN-EL15 batteries charged and ready. They’re reliable, long-lasting, and essential for keeping my D850 running all day.
This gear has my back — every single day without fail.